Good paving is like good cake frosting: all the effort it took to create a perfectly smooth surface is not noticed by anyone. Therefore, visitors are likely to applaud the color, architecture, and ingenuity of your paving project without complimenting you on how beautiful it is. Normal paving is a challenge. Apply patience, work step by step, and let the silence of your viewers signal a fine job well done.
Step 1
To mark the outer edge and form of your project, lay out a rope or garden hose. Suppose it’s a rectangle 10 feet by 12 feet, for instance.
Step 2
At the corners of the rectangle, pound stakes into the ground. Wind string and tie securely around the stakes at ground level. Remove the garden hose or chain.
Step 3
Slide the carpenter’s level all the way around the rectangle along the string. The ground should be level for pavers to drain, but with a slope of 1 inch to every 4 feet in length, to encourage drainage. To demonstrate a slope of 3 inches over a length of 12 feet, use your measuring tape to change the string as required. Verify that the string’s slope is also at the level of your carpenter. The bubble will be slightly off-center on the slope at bubble level. At the off-center point, mark the level gauge with tape or a marker, so you can check for a clear slope across the field. For a level slope, you’re calculating, not just a flat surface.
Step 4
By adding base drainage gravel (4 inches), base sand (3 inches), and the depth of the pavers (6 inches), a total of 13 inches, measure the depth of your paving project. You can retain this depth all the way down your sloped bed, so that, as the pavers at the bottom, the pavers at the top are just above the level. The floor appears both level and smooth to viewers and those who walk on the pavers.
Step 5
To decide the complete area you can dig, add the depth total to the outer edge of the project. Your 10-by-12 rectangle now measures 11 feet 1 inch by 13 feet 1 inch (10 feet plus 13 inches) (12 feet plus 13 inches). With your shovel, map out the expanded plot. Dig the soil down to the depth needed. Rake smooth and with your plate compactor, pack back. To even inspect packing, roll or slide rod, pipe, or lumber over the soil.
Step 6
Measure the distance between the string and the compacted dirt. When the soil is even, smooth, and compact, add gravel. Test, as above, with a rod, pipe, or lumber.
Step 7
Spread sand over the gravel. Rake smoothly and search with the rod, pipe or lumber for evenness. Alternatively, on the gravel, lay multiple 1-inch pipe lengths and dump sand to a depth of an inch. Smooth, carefully raise pipe lengths with another pipe, rod or piece of lumber and transfer to another section of the sand, repeat pouring and smoothing. For each inch of sand required, repeat again.
Step 8
Set the pavers on the sand gently. With the plate compactor, press down hard. Press the edge restrictions directly across the pavers into the sand.
Step 9
Scatter extra sand over the pavers and brush it over the blocks until the sand fills their seams. During the patio season, you will likely repeat this move many times. If needed, add a sand sealer to hold the sand in place.
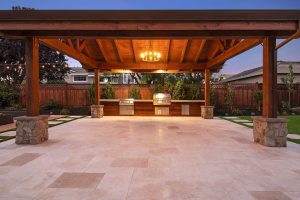
Are You Considering Purchasing Patio Pavers?
At DPG Design and Build, we’ve been providing our customers with specialized Landscape and Hardscape Design and Build services for over 30 years. DPG Design and Build, headquartered in San Ramon, California is the best curb appeal and outdoor living space designer and installer in the San Francisco Bay Area. Appearing on HGTV’s Curb Appeal and featured on Discovery Channel’s program Renovation Nation, our team of skilled designers and landscape engineers provides top-quality service and professionalism our customers love. DPG Design and Build offers 2-D and 3-D conceptual home and landscape design plans that allow you to visualize your dream space and make that dream concept a reality.
Have a patio in need of an upgrade? Contact DPG Design and Build to schedule your free consultation today!